Vinyl(Captain America)
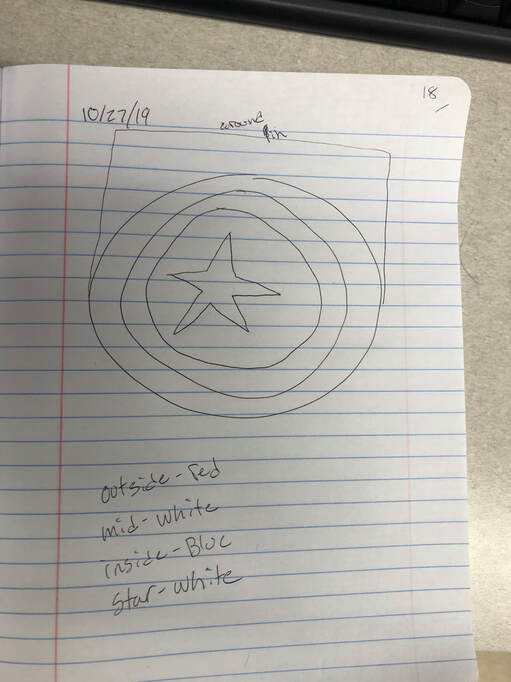
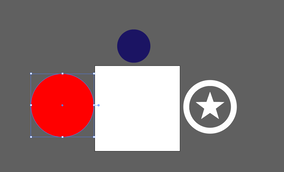
From finding out about this project I wanted to make a Captain America shield. I Thought this because it has all I need. It has three colors, red, white, and blue. Also I love Captain America. The shield is a circle, my thinking was that it would be easy to line every thing up.
First Steps
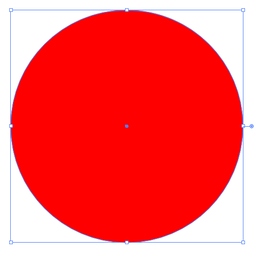
Step 1: Start with a red circle because that is the back ground of your shield or the outer layer of the shield.
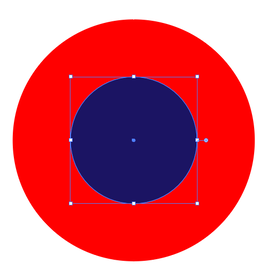
Step 2: Make a smaller blue circle to be the inside circle.
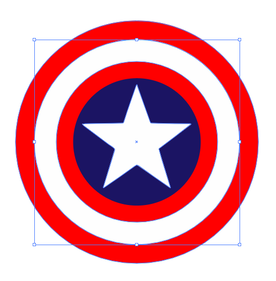
Step 3: Make a white circleish line and a start. The star should be be in the center of the blue circle.
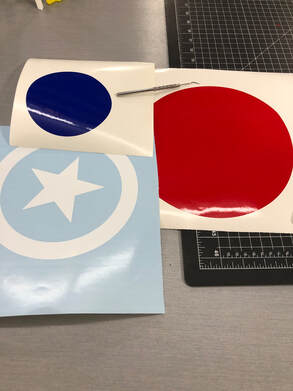
Step 4: Separate all the colors. This is the start of the printing process.

Step 5: This is the print screen. I put the circle in the bottom left to use the least amount of vinyl.
Finishing Vinyl

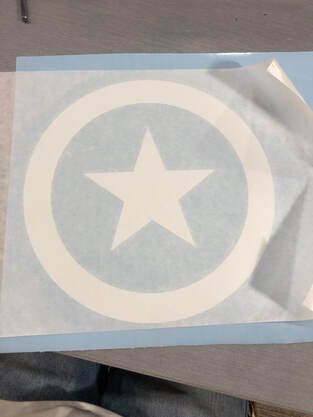
Step one: Roughly cut out the thing you used the laser to cut out. This will make it easy to weed and uses less vinyl.
Step 2: Use the pick to weed. Weeding is the act of removing the unneeded material of your picture.
Step 3: Find your top layer and grab the transfer tape. Use enough transfer tap for your whole project. When you apply the transfer tap use the squeegee to press the tap onto your project.
Step 4: Take of your first layer with the tap and go to your second layer. Line up both the first and second layer to make it look right. Then squeegee the first layer to the second layer.
Step 4: Take of your first layer with the tap and go to your second layer. Line up both the first and second layer to make it look right. Then squeegee the first layer to the second layer.
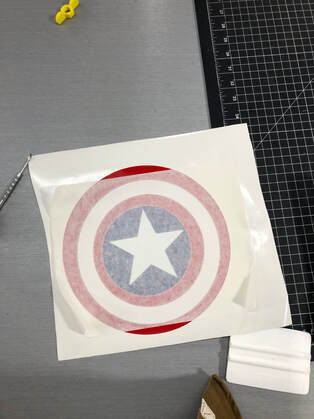
Step 5: Do the same as step 4, but now you have layer 1 and 2 together.
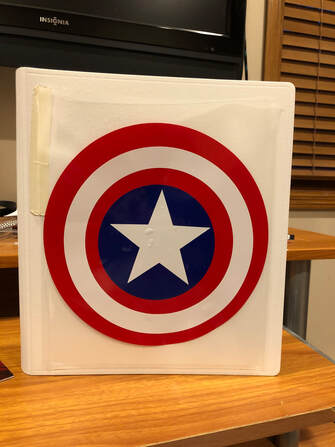
Step 6: Finally find something to put it on. Remove the 1-3 layers, the should be all connected, to your object that you will be puttig it one. Use a squeegee to get rid of any air pockets.
Summary
I have learned a lot through out this project. I think that the most important part was remembering what the colors mean. The only two colors that I used were red and black. The red was to cut out the skier on the front. The black was to engrave the words "Snowflake" and to engrave the snowman on the back.
